
Applies to: Fundations (Free) and Fundations Pro Time to complete: 10-15 minutes
This guide walks you through creating a fundraiser, accepting a test donation, and sharing your page.
Before you start
Complete the following before this guide:
- Fundations is installed and activated (see Installation & Setup)
- The page installer has been run and all 7 pages are accessible
- At least one payment provider is configured
- You are using a block theme (see Theme Compatibility)
Step 1: Create a fundraiser
Using the wizard (recommended for all users)
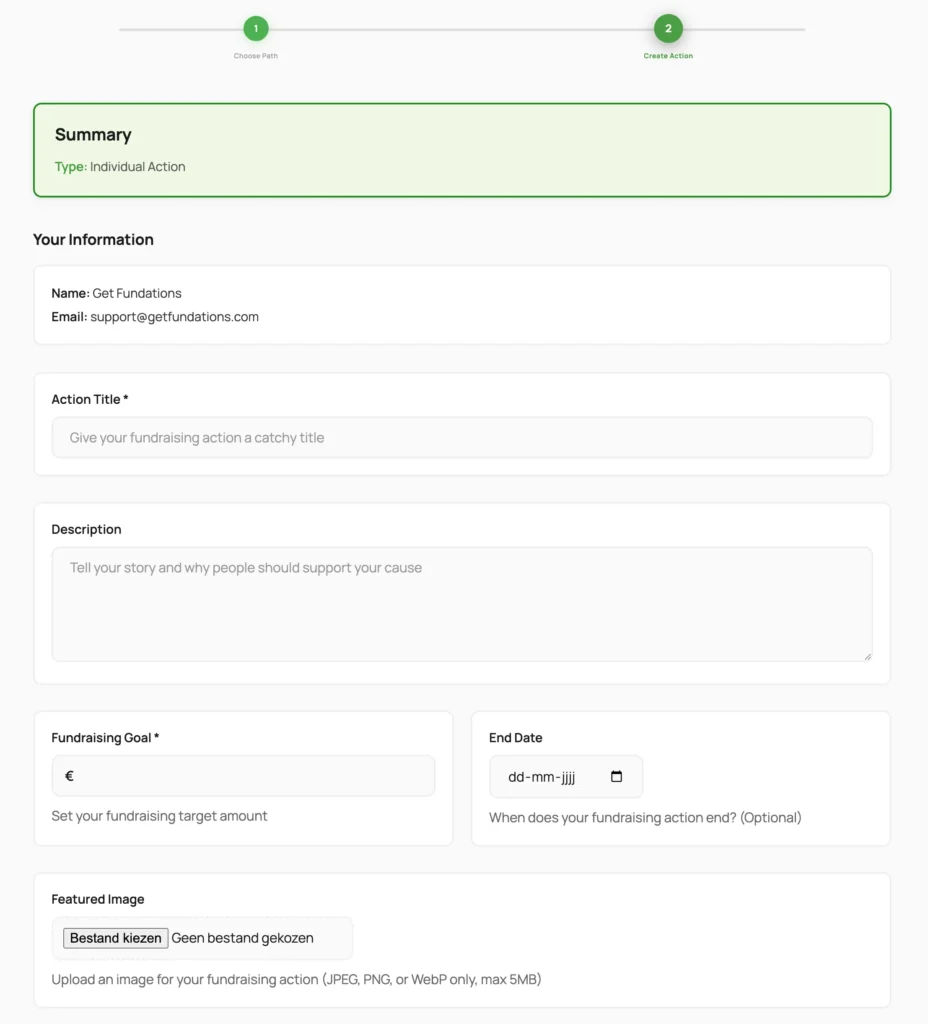
The wizard is the frontend creation flow that both registered users and guests can use.
- Navigate to your Create Fundations page (default URL:
/create-fundations) - Complete the wizard steps:
- Choose whether this fundraiser is standalone, joins an existing team, or creates a new team. For your first fundraiser, leave this as standalone.
- Enter a name and write a description. Use the rich text editor to format your story.
- Upload a main photo.
- Set a target amount. You can also set an end date to limit the fundraiser to a specific period.
- Confirm the details and submit.
- After submitting, you are redirected to your new fundraiser page.
Guest mode
The wizard supports guest creation. A visitor does not need an account to create a fundraiser. After completing the wizard, the guest receives an email with a claim token. Following that link lets them claim ownership of the fundraiser and create an account later. The claim link is valid for 30 days.
If you are testing this flow, use an email address you can access to receive the claim token.
Using the WordPress admin
Administrators can also create fundraisers directly:
- Go to Fundations → Add New
- Add a title and content in the block editor
- In the sidebar, set the goal amount, end date, and status
- Set a featured image
- Click Publish
Step 2: Customize your fundraiser page
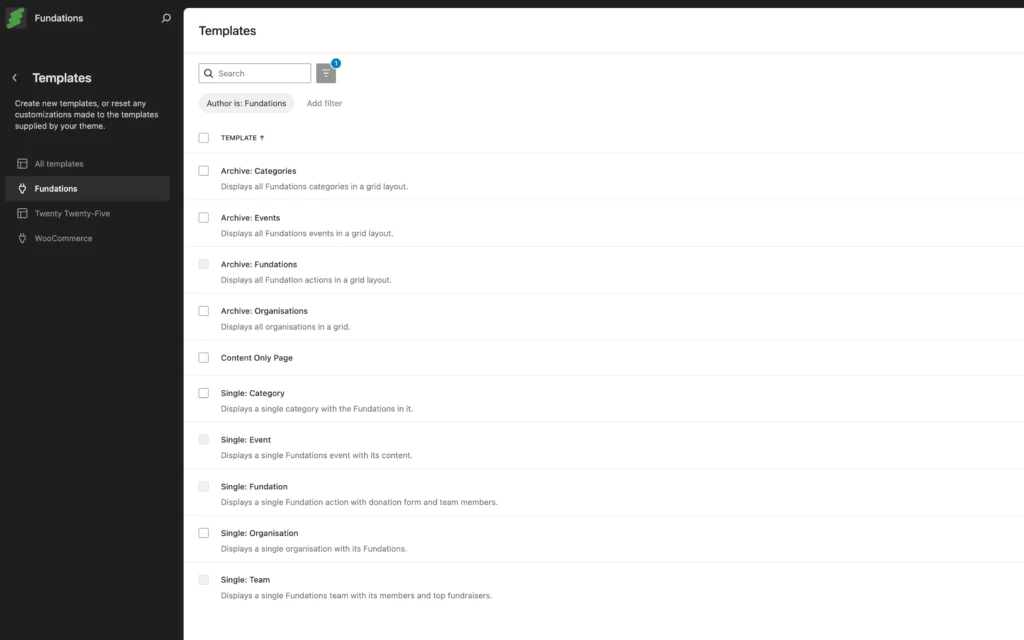
The fundraiser page uses a block template. You can add or rearrange blocks from the block editor or the Site Editor.
Blocks available
Fundations ships approximately 27 blocks in the Free version. A selection of commonly used ones:
| Block | Purpose |
|---|---|
| Progress Bar | Visual progress toward the fundraising goal |
| Stats | Raised amount, donor count, days remaining |
| Circular Progress | Round progress indicator variant |
| Donors | List of recent donors |
| Gallery | Image gallery with slider and lightbox |
| Campaign Updates | Post updates to keep supporters informed |
| QR Code | Scannable code linking to this page |
| Donation Form | Inline donation form |
| Child Actions | Sub-campaigns for team fundraising |
To add a block: open your fundraiser in the block editor, click the + button, and search under the Fundations category.
Block patterns
Pre-built patterns let you add a complete layout quickly:
- Click + in the editor, switch to the Patterns tab
- Select the Fundations category
- Choose a pattern such as Full Layout, Progress Only, Archive Grid, or Compact List
Step 3: Accept a test donation
- Visit your fundraiser page on the frontend
- Locate the donation form
- Enter a name and email address
- Select or type a donation amount
- Choose the payment method
- Complete the payment using your provider’s test credentials
After a successful payment:
- The donor is redirected to the Thank You page
- The raised amount and progress bar on the fundraiser page update
- The donation appears in Fundations → Donations in the admin
- A confirmation email is sent to the donor (check spam if not received)
Step 4: Share your fundraiser
Direct link
Copy the URL of your fundraiser page and share it via email or messaging apps.
QR code
Add the QR Code block to your fundraiser page. Supporters can scan it to open the page on their phone.
Embed blocks on other pages
You can place individual Fundations blocks on any page of your site:
- Add the Progress Bar to your homepage
- Add the Archive Grid pattern to create a campaign listing page
- Add the Donors block to a sidebar or landing page
Step 5: Manage your fundraiser
Frontend editing
When you are logged in and viewing your fundraiser page, an Edit button appears. Clicking it opens a frontend editor where you can update the title, description, goal, and featured image without going to the WordPress admin.
User dashboard
The Fundations Account page (default: /fundations-account) shows all your fundraisers, your donation history, and your profile settings.
Admin management
In the WordPress admin under Fundations:
- All Fundations: View, search, filter, and edit all fundraisers
- Donations: View all donations with status, amount, and donor details
- Settings: Configure plugin behavior
Setting up team fundraising
Peer-to-peer fundraising lets supporters create their own pages that contribute to a parent campaign:
- Create a fundraiser and mark it as a campaign (enable the campaign flag in the sidebar)
- Share the Create Fundations wizard page with supporters
- In the wizard, supporters choose to join your campaign
- Their fundraisers are linked as child actions
- Their donations roll up to the campaign total
- Use the Campaign Members or Top Members blocks to display a leaderboard
Common questions
Can anyone create a fundraiser on my site? Yes. Any visitor can use the wizard on your Create Fundations page. New registered users receive the Fundraiser role automatically. Guests can create fundraisers without an account and claim them later.
How do I change the currency? For the Free plan with PayPal, currency is set in your PayPal account settings. For Pro users with Mollie or Stripe, currency is configured in those respective dashboards. Fundations displays amounts using the currency your payment provider reports.
Are recurring donations available? Not in the current release. Recurring donations are disabled in both Free and Pro. The feature is planned for a future release.
What happens when someone donates? The donation is recorded, the raised amount updates, the progress bar refreshes, the donor receives a confirmation email, and the donation appears in Fundations → Donations.
Can donors give anonymously? Yes. The donation form includes an anonymous option. The donor still provides an email for the receipt, but their name is not displayed publicly.
What is the guest claim flow? Guests who create a fundraiser receive an email with a claim link. Following the link takes them to the Claim Fundations page where they can create an account and take ownership of their fundraiser. The link expires after 30 days.
Troubleshooting
The wizard page is blank or shows an error. Check that the page installer has run and the wizard page is assigned correctly in Fundations → Settings → Permalinks. Flush rewrite rules by saving Settings → Permalinks.
The progress bar is not updating after a donation. Confirm the donation status is Paid in Fundations → Donations. For PayPal, the webhook from PayPal triggers the status update. If the webhook is not reaching your site (common in local development), the status may remain pending until the next cron run (every 30 minutes).
No confirmation email was received. Check the donor’s spam folder. Confirm the email type is enabled in Fundations → Settings → Emails. On shared hosting, verify that wp_mail() is functioning by using a test email plugin or an SMTP service.
The donation form does not appear on the page. The donation form is a block (get-fund/donation-form). Confirm the block is present on the fundraiser page or in the single fundraiser template in the Site Editor.